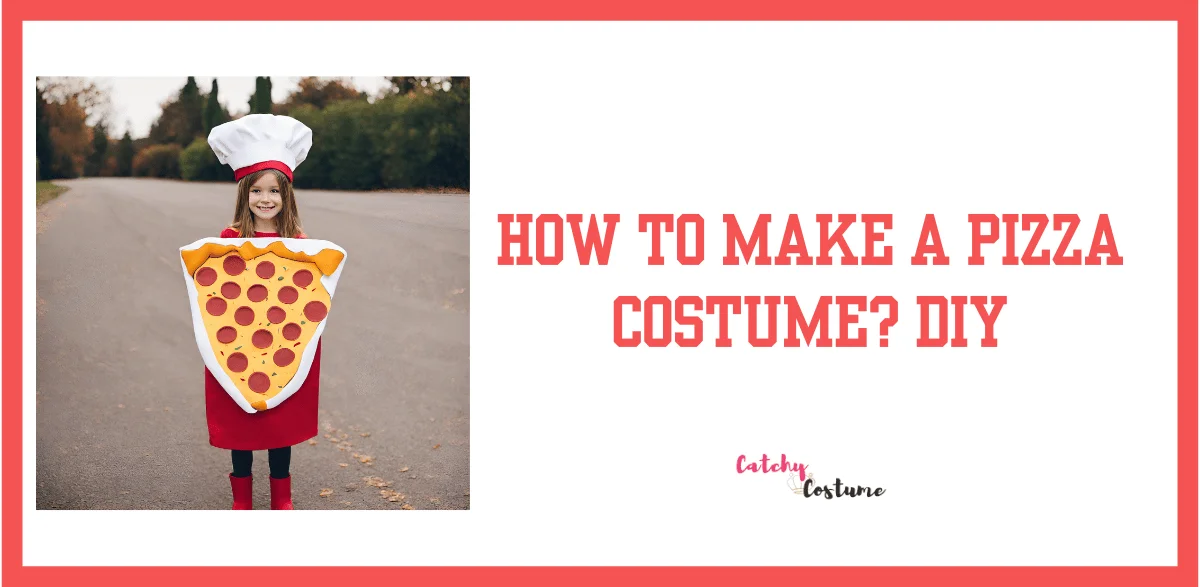
If your creative gears are turning towards the delicious realm of pizza, you’re in for a treat! Making a pizza costume is not just a fun DIY project; it’s an art form that allows you to showcase your ingenuity and stand out in the crowd.
To make a pizza costume, you can easily create one using cardboard or paper. Simply cut out a circle for the base of the pizza, then add toppings using colored paper or felt.
It’s a fun and easy DIY project that can be customized for both kids and adults. Creating your own Halloween costume can be a fun and creative way to express yourself. If you’re a pizza lover, why not dress up as everyone’s favorite cheesy delight?
Making a pizza costume is a simple DIY project that can be done using basic materials like cardboard or paper.
We’ll explore different methods for creating a pizza costume that can be tailored to your own preferences. Let’s get started and make a pizza costume that will have everyone craving a slice!
How To Make A Pizza Costume: Materials Needed
To make a pizza costume, you will need the following materials:
Cardboard
Cardboard will be the main material for constructing the pizza costume. It is durable and easy to work with, making it perfect for creating the pizza slice shape.
Paint
Paint will be used to give the cardboard slice a realistic pizza appearance. Choose colors that resemble the shades of a typical pizza crust, sauce, and toppings.
Scissors
Scissors are essential for cutting the cardboard into the desired pizza slice shape. Make sure to use sharp scissors to achieve clean and precise cuts.
Glue
Glue will be used to assemble the different parts of the costume and secure the painted cardboard pieces together. Choose a strong adhesive that can withstand movement and durability.
String Or Elastic
String or elastic will be used to create straps or loops to secure the pizza slice around the wearer’s shoulders or body. This will allow for easy wearing and adjusting of the costume.
Markers Or Colored Pencils
Markers or colored pencils will be used to add small details and enhance the overall appearance of the pizza slice. Choose colors that resemble the toppings you want to depict on the costume.
Step 1: Creating The Pizza Slice Shape
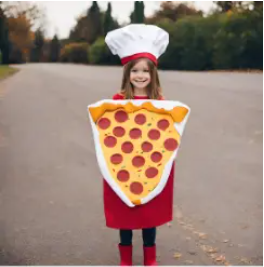
When it comes to making a pizza costume, the first step is creating the pizza slice shape. Follow this guide to create a realistic and fun pizza costume that will surely turn heads!
Cut A Large Triangle Shape Out Of Cardboard
To start, you will need a large piece of cardboard. Using scissors or a box cutter, carefully cut out a triangle shape that resembles a pizza slice. Make sure the triangle is large enough to fit your body when worn as a costume. Adjust the size according to your preference.
Remember to take safety precautions while cutting the cardboard, as sharp tools can be dangerous. It’s a good idea to lay the cardboard on a flat surface and ensure a stable cutting area.
Use Markers Or Colored Pencils To Draw Pizza Toppings On The Cardboard, Such As Pepperoni, Mushrooms, And Cheese.
Once you have the pizza slice shape, it’s time to add some delicious-looking toppings!
Using markers or colored pencils, draw pepperoni, mushrooms, cheese, or any other toppings you desire on the cardboard. Be creative and make the toppings as realistic as possible!
You can refer to images of actual pizza slices or use your imagination to create unique toppings. Don’t forget to add some cheesy stretches and vibrant colors to make the costume truly eye-catching.
If you’re not confident in your drawing skills, you can also print out pizza topping images and glue them onto the cardboard. This will ensure a neat and professional look.
Remember to let the markers or colored pencils dry completely before moving on to the next step to avoid smudging or smearing.
Creating the pizza slice shape is just the first step in making a pizza costume. Stay tuned for the next steps to complete your delicious pizza costume!
Step 2: Adding Details
Once you have your cardboard triangle base ready, it’s time to add some mouth-watering details to transform it into a delicious-looking pizza slice. This step will bring your pizza costume to life and make it look more realistic.
Here’s how you can add those enticing details:
Use Paint To Add A Crust Edge To The Cardboard Triangle
Start by using paint to create a crust edge on the outer side of your cardboard triangle. This will give your pizza slice a more authentic look. Choose a shade of brown or tan that resembles the color of a pizza crust.
Using a small paintbrush, carefully trace along the outer edge of the triangle, creating a wavy or jagged pattern to mimic the irregular shape of a pizza crust. Be sure to let the paint dry completely before moving on to the next step.
Paint The Toppings To Make Them Look More Realistic
The toppings are what make a pizza truly appetizing. To make your pizza costume more realistic, use paint to bring the toppings to life. Think about the toppings you want to include on your pizza costume, such as pepperoni, mushrooms, or vegetables.
Choose appropriate colors of paint for each topping. Use a small paintbrush to carefully paint each topping onto the surface of the cardboard triangle. Pay attention to the size, placement, and arrangement of the toppings to make them look visually appealing. Let the paint dry thoroughly.
You may also love “How To Make A Deer Costume?“
Add Any Additional Details, Such As Oregano Or Red Pepper Flakes
To take your pizza costume to the next level, consider adding some extra details that will make it stand out. These can include sprinkling oregano or red pepper flakes on top of the painted toppings. To achieve this, you can use craft materials like fake oregano or red pepper flakes or simply paint them on using fine brushes or sponges.
Don’t forget to let everything dry completely before moving on to the next step.
By following these steps and adding the right details, your pizza costume will look so realistic that people will be tempted to take a bite out of it!
Explore more, “How To Make A Turkey Costume For Adults?“
Step 3: Creating Arm Holes
Now that you have your cardboard triangle cut out in the shape of a pizza slice, it’s time to create the arm holes. This step is crucial to ensure the costume is comfortable and allows easy movement. Follow these instructions to create the perfect armholes for your pizza costume.
Measure Where You Want The Arm Holes To Be On The Cardboard Triangle
To start, measure the exact location where you want the arm holes to be on the cardboard triangle. This will vary depending on the size of the person wearing the costume. Use a ruler or measuring tape to carefully mark the measurements on the cardboard. Remember to leave enough space for the person’s arms to comfortably fit through the arm holes.
Cut Out Two Smaller Triangles At Those Measurements
Using a pair of scissors or a craft knife, carefully cut out two smaller triangles at the measurements you marked earlier. Make sure to cut through both layers of the cardboard to create the arm holes.
Take your time to ensure that the cuts are clean and precise. You can smooth out any rough edges using sandpaper if necessary.
Make Sure The Arm Holes Are Large Enough For Comfortable Movement
Before finalizing the arm holes, make sure to check if they are large enough for comfortable movement. The person wearing the costume should be able to freely move their arms without any restrictions.
Test the arm holes by having the person try on the costume and move their arms around. If needed, you can always adjust the size of the arm holes by trimming them slightly larger.
With these three steps, you have successfully created the armholes for your pizza costume. The next step will be to add details and decorations to make your pizza slice look even more realistic.
Step 4: Attaching Strings Or Elastic
Once you have your cardboard triangle cut-out ready, it’s time to attach strings or elastic to each side. This will allow you to comfortably wear the pizza costume around your shoulders or waist. Follow these simple steps to ensure a secure and hassle-free attachment:
Attach String Or Elastic To Each Side Of The Cardboard Triangle
Using a pair of scissors or a hole puncher, make small holes near the top corners of the cardboard triangle on both sides. Be sure to space them evenly apart for better balance. These holes are where you will attach the strings or elastic.
Once the holes are ready, cut two pieces of string or elastic, each measuring long enough to tie around your shoulders or waist comfortably. Remember to leave enough length to ensure a snug fit.
Insert one end of the string or elastic through the hole on one side of the cardboard triangle. Tie a secure knot on the inside of the triangle to prevent it from coming loose. Repeat this step on the other side, ensuring that the strings or elastic are symmetrical.
You can easily slide the pizza costume on and adjust the strings or elastic to your desired fit. Whether you prefer to wear it on your shoulders or around your waist, this attachment method will keep your pizza costume in place throughout the night.
Remember, comfort is key, so test out the fit and make any necessary adjustments before wearing your pizza costume for the big event.
Step 5: Putting On The Costume
Transform yourself into a delicious pizza with this easy step-by-step guide on how to make a pizza costume. No sewing is required, just some cardboard and paper, and you’ll be ready to be the life of the party!
Now that you have successfully created your irresistible pizza slice costume, it’s time to put it on and get ready to amaze everyone at the Halloween party. Follow these simple steps to ensure a comfortable and secure fit:
Put The Pizza Slice Costume Over Your Head
Boldly lift the pizza slice costume and place it over your head. Make sure the opening is positioned at the front and the design is clearly visible. The mouth-watering toppings should be facing out!
Tie The Strings Or Elastic Around Your Shoulders Or Waist
Secure the costume in place by tying the strings or elastic around your shoulders or waist, depending on the design of your costume. This will keep the costume from slipping and ensure that it stays in place throughout the night.
Adjust The Costume As Needed To Ensure A Comfortable Fit
Once the costume is secured, take a moment to check if it fits comfortably. You don’t want it to be too tight or too loose. Adjust the strings or elastic bands if necessary to achieve the perfect fit. Remember, you’ll be wearing this costume for a while, so comfort is key!
Now, you’re all set to bring the pizza party to life with your amazing pizza slice costume! Go out there, have fun, and enjoy all the compliments you’ll undoubtedly receive!
Step 6: Adding Optional Accessories
Once you’ve completed the main part of your pizza costume, it’s time to take it to the next level by adding some optional accessories. These accessories will help complete the overall look and make your pizza costume even more convincing. Here are a few ideas to get you started:
Create A Chef’s Hat Out Of White Paper Or Fabric
Nothing says “pizza chef” like a traditional chef’s hat. To create your own, you can use white paper or fabric. Here’s a simple tutorial on how to make one using white paper:
- Take a rectangular piece of white paper and fold it in half lengthwise.
- Next, fold the paper in half again widthwise to form a smaller rectangle.
- Now, fold the top edge of the rectangle down towards the center, creating a triangle shape.
- Fold up the bottom edge of the triangle towards the center, tucking it slightly under the top edge.
- Secure the folds with glue or tape to hold the hat together.
- Finally, adjust the size of the hat by opening or closing the folds as needed.
Wear An Apron And Carry A Pizza Box To Complete The Look
To truly embody the spirit of a pizza maker, wearing an apron and carrying a pizza box is essential. Here’s how you can do it:
- Find a plain white or black apron that fits you.
- Tie the apron around your waist, making sure it’s secure but comfortable.
- For the pizza box, you can either purchase a real empty pizza box or make one out of cardboard.
- If making one from cardboard, measure and cut out a rectangular shape that’s big enough to hold a large pizza.
- Decorate the cardboard box to resemble a pizza box by drawing or painting a pizza design on the front.
- Once your pizza box is ready, carry it with pride to complete your pizza costume.
Frequently Asked Questions On How To Make A Pizza Costume?
How do I choose the right materials for my pizza costume?
Crafting the perfect pizza costume begins with selecting the right materials. Opt for durable fabrics that mimic the texture of pizza crust, and don’t forget the vibrant felt for the toppings. Look for materials that are easy to work with and ensure comfort when wearing your delicious creations.
Can I customize my pizza costume based on my favorite toppings?
Absolutely! The beauty of making your own pizza costume lies in the customization. Whether you’re a fan of pepperoni, mushrooms, or pineapple, choose toppings that resonate with your personal taste. This way, your costume becomes a unique reflection of your pizza preferences.
How do I ensure my pizza costume fits well and is comfortable to wear?
Achieving the perfect fit is crucial for a comfortable costume. Take accurate measurements before cutting your fabric, and consider adding adjustable straps or elastic bands to accommodate movement. Prioritize comfort without compromising on the visual appeal of your pizza masterpiece.
What creative embellishments can I add to make my pizza costume stand out?
Elevate your pizza costume with creative embellishments! Consider adding shiny sequins for a cheesy effect, or use fabric paint to create realistic sauce drips. Experiment with textures and details to make your costume not just a pizza replica but a true work of art.
How long does it typically take to make a DIY pizza costume?
The time required to craft a pizza costume depends on your skill level and the complexity of your design. Generally, with the right materials and a well-thought-out plan, you can complete your pizza costume over the weekend. Take your time, enjoy the process, and savor the satisfaction of wearing a costume you crafted with love and creativity.
Final Overview
To create a deliciously realistic pizza costume, follow these simple steps: gather your materials, cut out a large circle from cardboard for the base, paint it to resemble a pizza crust, and then add colorful toppings using felt or fabric.
Remember to add straps or Velcro for easy wearing. This DIY pizza costume is a fun and unique option for Halloween or dress-up parties. Get creative and customize your toppings to make your pizza costume truly one-of-a-kind. Let your imagination run wild and have a slice of costume-making fun!