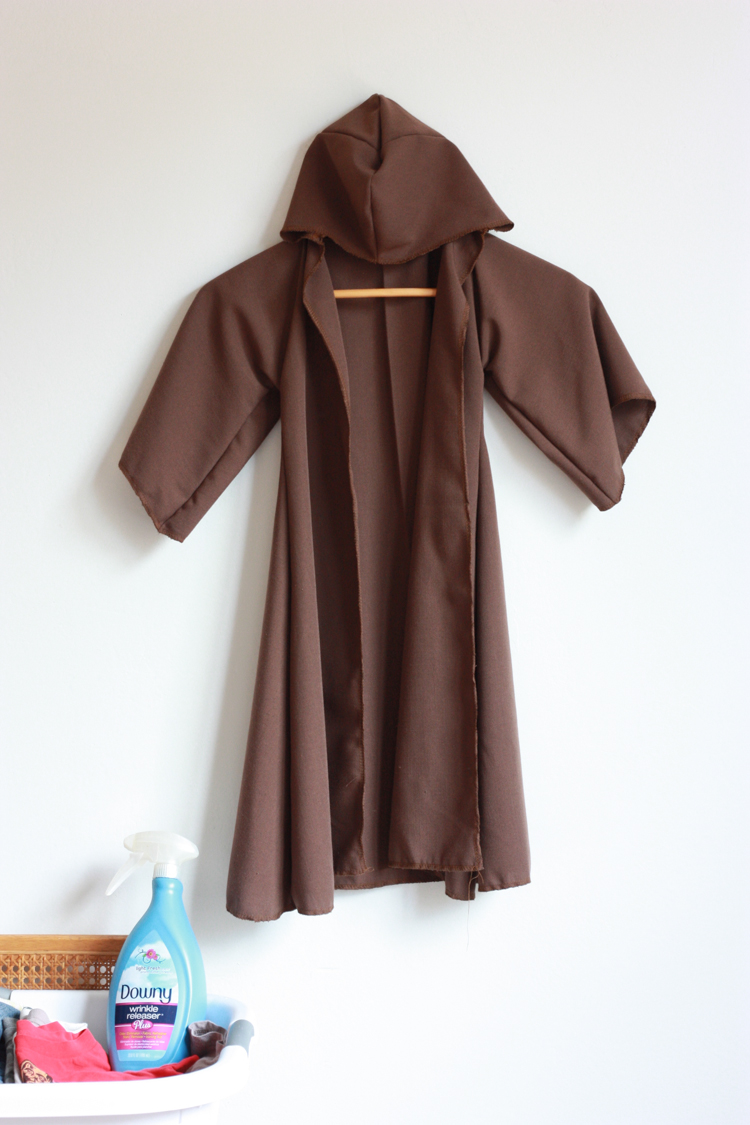
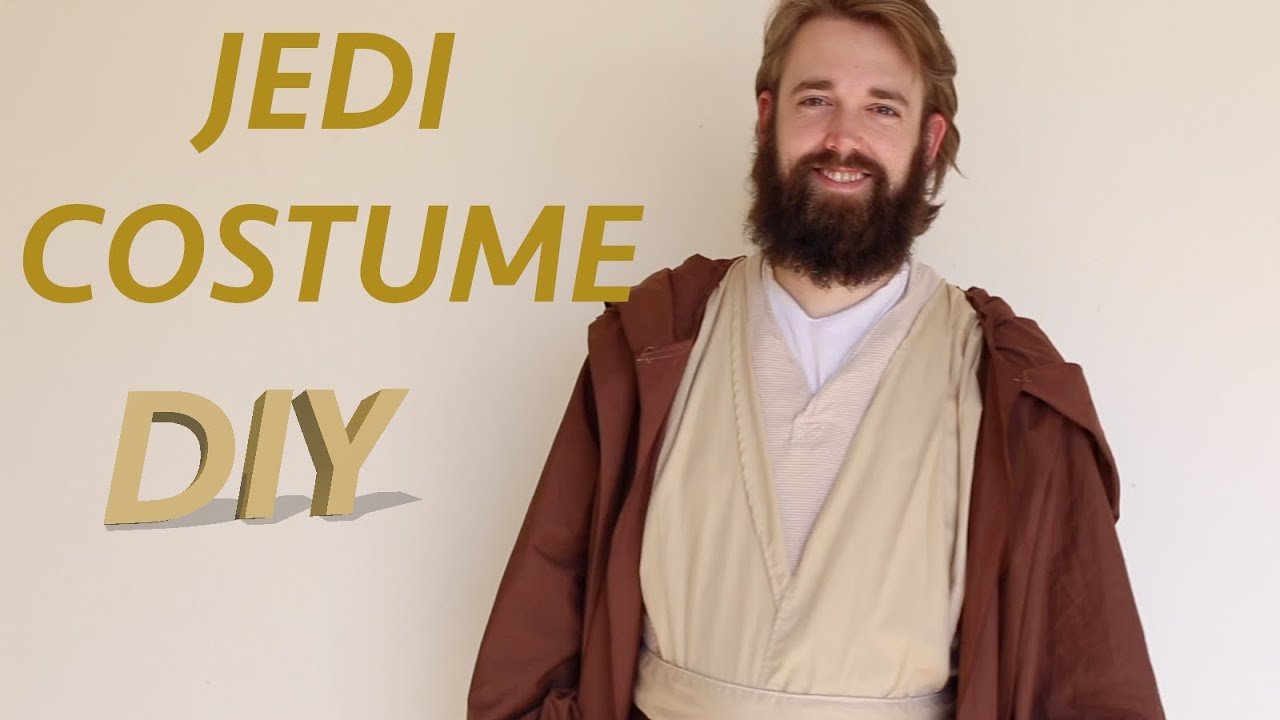
To make a Jedi costume, create long, flowing robes in earth tones, including an overtunic, undertunic, cloak with a hood, and sometimes a tabard. You can use wool or cotton fabric for the robes, and you can sew them or purchase them online.
Avoid itchy fabrics that may irritate the skin. Additionally, you can make a Jedi hood by sewing one edge of a piece of fabric from the fold to the end and then turning it inside out. For the pants, you can use regular khaki pants or modify them to fit the Jedi aesthetic.
To complete the look, consider adding accessories like a lightsaber and Jedi boots. Whether you’re cosplaying or dressing up for Halloween, making your own Jedi costume is an easy and fun DIY project.

Credit: livefreecreative.co
Materials Needed
To make a Jedi costume, you will need materials such as earth-toned fabric for the robes, interlock-type jersey material for the inner tunic, crinkled cotton fabric for the outer tunic, khaki pants, and a wool outer hooded robe.
Making a Jedi costume is a fun and creative project that allows you to channel your inner Jedi knight. To get started, you will need the following materials:
- Fabric: Choose a fabric that is suitable for making a robe, such as cotton or wool. Earth tones like brown or beige work well for a Jedi costume.
- Sewing machine or needle and thread: Depending on your sewing skills and preferences, you can use either a sewing machine or hand-sew your costume.
- Scissors: A good pair of fabric scissors will be essential for cutting your fabric to the desired size and shape.
- Measuring tape: A measuring tape will help you accurately measure your body to ensure the costume fits well.
- Pins: Pins are necessary for securing the fabric together before sewing.
- Iron: An iron will come in handy for pressing and flattening the fabric, giving your costume a polished look.
With these materials, you’ll be well-equipped to create an impressive Jedi costume that will make you feel like a true Jedi knight.
Now, let’s dive into the step-by-step process of making a Jedi costume!
Choosing The Right Fabric
When it comes to making a Jedi costume, one of the most important aspects to consider is choosing the right fabric. The fabric you choose will greatly impact the overall look and feel of your Jedi robes. So, let’s dive into the different fabric options and find out which one is best for your Jedi costume.
Considering Different Fabric Options
When considering different fabric options for your Jedi costume, it’s important to keep in mind the look and feel you want to achieve. Jedi robes are known for their simple and comfortable design, often made from earth-tone fabrics. Here are a few fabric options to consider:
- Cotton-Linen Blend: A cotton-linen blend fabric is a popular choice for Jedi robes. It combines the durability of cotton with the lightweight and breathable properties of linen.
- Wool: Wool was commonly used for Jedi outer robes, particularly a coating weight wool. It provides a warm and textured look, perfect for creating an authentic Jedi costume.
- Crinkled Cotton: For the outer tunic, crinkled cotton fabric can be used to add texture and depth to your Jedi robes. It gives a slightly rougher and more rugged appearance.
Best Fabric For Jedi Robes
When it comes to choosing the best fabric for Jedi robes, a combination of cotton-linen blend and wool is highly recommended. The cotton-linen blend will provide comfort and breathability, while the wool outer robe will give the costume the desired texture and warmth.
It’s important to ensure that each fabric is of high quality and suitable for the purpose of creating a Jedi costume. Look for fabrics in earth-tone colors, such as brown, beige, or khaki, as they will help to achieve an authentic Jedi look.
Remember to consider the climate and purpose of your costume. If you plan to wear it for an outdoor event, opt for lighter fabrics that will provide better ventilation. If you’re making a Jedi costume for cosplay or a convention, choose slightly heavier fabrics for a more dramatic effect.
| Fabric Option | Properties |
|---|---|
| Cotton-Linen Blend | Durable, lightweight, breathable |
| Wool | Warm, textured |
| Crinkled Cotton | Textured, rugged |
By carefully selecting the right fabrics and considering the specific qualities you want in your Jedi costume, you’ll be able to create a stunning and authentic look that truly captures the essence of a Jedi knight.
Designing The Jedi Robes
Designing the Jedi robes is an essential step in creating an authentic and impressive Jedi costume. The robes are iconic and instantly recognizable, making them a crucial element of any Jedi ensemble.
In this section, we will explore the process of designing the Jedi robes, including researching different designs, sketching and planning the layout, and ensuring that each detail adheres to the desired aesthetic.
Researching Jedi Robe Designs
Before diving into the creation of your Jedi robes, it is crucial to conduct thorough research on various Jedi robe designs. This step will help you gain inspiration and find the perfect design that aligns with your vision. Take the time to browse online resources, such as forums, tutorials, and Star Wars fandom websites, to discover different interpretations of Jedi robes.
Consider factors such as the cut, length, and fabric choices that distinguish different Jedi robe designs. Pay attention to details like the overtunic, the undertunic, the cloak with a hood, and the tabard, as variations in these elements can add uniqueness to your costume.
Sketching And Planning The Robe Layout
Once you have gathered sufficient inspiration and ideas, it’s time to start sketching and planning the layout of your Jedi robes. Grab a piece of paper or a sketching app and begin visualizing your design. It’s essential to consider proportions, symmetry, and overall balance to create a visually appealing robe.
Start by drawing the basic outline of the robes, including the length, width, and drape. Pay attention to the hood shape and the sleeves cut. Remember, Jedi robes are typically long and flowing, so ensure that your sketch captures this characteristic.
After sketching the initial design, make necessary adjustments and refine the details. Consider how the various robe components will interact with each other, ensuring a harmonious and cohesive final look.
Once you are satisfied with your sketch, it’s time to move on to the fabric selection and sourcing. Look for fabric options that possess the desired weight, drape, and texture to bring your Jedi robes to life.
In conclusion, designing Jedi robes is a creative and exciting process that requires careful research and planning. By exploring various Jedi robe designs and sketching out your vision, you can ensure your Jedi costume stands out and captures the essence of this iconic Star Wars character.
Cutting And Sewing The Robe
Create your own Jedi costume by cutting and sewing the robe. Jedi robes were simple and comfortable and consisted of an overtunic, undertunic, cloak, and hood. Choose earth-toned fabrics and follow a tutorial to make your own Jedi apparel.
Taking Accurate Measurements
To ensure the perfect fit for your Jedi costume, it’s essential to start by taking accurate measurements. You’ll need a measuring tape and someone to assist you.
Here are the key measurements you’ll need:
- Chest – Measure around the fullest part of your chest, making sure the tape is snug but not too tight.
- Waist – Measure around your natural waistline, which is typically the smallest part of your waist.
- Hip – Measure around the fullest part of your hips.
- Height – Stand with your back against a wall and measure from the floor to the top of your head.
Cutting The Fabric According To Measurements
Once you have your measurements, it’s time to cut the fabric for your Jedi robe. You’ll need to choose a fabric that drapes well and is comfortable to wear. The most common fabric choice for Jedi robes is a medium-weight cotton or linen blend.
- * Using your measurements, create a pattern for the body of the robe.
- * Lay the fabric flat on a large surface and place the pattern on top.
- * Secure the pattern to the fabric with sewing pins.
- * Carefully cut around the pattern, following the designated lines.
Sewing The Robe Pieces Together
Now that the robe pieces are cut out, it’s time to sew them together. Sewing the robe requires some basic sewing skills and a sewing machine. Here’s how to do it:
- Start by sewing the shoulder seams together, right sides facing each other. Use a straight stitch and reinforce the seams with backstitching.
- Next, sew the side seams together, again with the right sides facing each other. Make sure to leave openings for the arms and hemline.
- Hem the bottom of the robe using a double-fold hem. Fold the fabric up once, about an inch, and then fold it again to hide the raw edge. Secure with pins and sew along the edge.
- Lastly, attach the hood to the neckline of the robe. Pin the hood to the neckline, right sides facing each other, and then sew along the edge.
By following these steps, you can create a Jedi robe that fits you perfectly and looks authentic. Remember to take your time and pay attention to the details to ensure a high-quality costume. May the Force be with you on your sewing journey!
Adding Hood To The Robe
The Jedi costume is not complete without the iconic hood that adds an air of mystery and reverence to the ensemble. Adding a hood to the robe is a crucial step in achieving an authentic Jedi look. In this section, we will guide you through the process of understanding the Jedi hood design, sewing the hood to the robe, and ensuring a seamless and professional finish.
Understanding The Jedi Hood Design
The Jedi hood is designed to be both visually striking and functional. It is typically a large, loose-fitting hood that extends from the back of the robe, draping over the wearer’s head and shoulders. This design allows for ease of movement while also providing an aura of mystique and anonymity. To create a Jedi hood, you will need a pattern that matches the style and proportions of a traditional Jedi robe. You can find pre-made patterns or create your own by measuring the dimensions of your robe and desired hood size.
Sewing The Hood To The Robe
Now that you have your pattern ready, it’s time to sew the hood onto the robe. Follow these steps to ensure a secure and seamless attachment:
- Place the fabric for the hood on top of the collar area of the robe, aligning the edges.
- Pin the fabric in place, making sure it lays flat and evenly distributed.
- Using a sewing machine or needle and thread, sew along the edges of the fabric, attaching the hood to the robe. Be sure to sew close to the edge to ensure a secure seam.
- Trim any excess fabric and thread.
- Turn the robe inside out to reveal the finished hood attachment.
- Try on the robe to ensure the hood sits comfortably and creates the desired effect.
Remember to iron the seams for a polished look and test the strength of the attachment by gently tugging on the hood. With these steps, you are well on your way to completing your Jedi costume. May the Force be with you!
Adding Finishing Touches
Once you have assembled the main components of your Jedi costume, it’s time to focus on adding the finishing touches. These final details will help bring your costume to life and give it an authentic Jedi look. In this section, we will cover three important steps: hemming the robe, adding closures, and ironing the completed costume.
Hemming The Robe
Hemming the robe is an essential step to ensure that the edges of the fabric are neat and tidy. To hem your Jedi robe, follow these simple steps:
- Turn the robe inside out to expose the raw edges of the fabric.
- Using a needle and thread or a sewing machine, fold the raw edge of the fabric inwards by about half an inch.
- Sew a straight stitch along the folded edge, securing the hem in place.
- Continue hemming all the way around the robe, including the sleeves and bottom hem.
Remember to try on the robe as you go to ensure the hem is the desired length. Once you have finished hemming, turn the robe right side out to admire your handiwork.
Adding closures to your Jedi costume is crucial for a secure and comfortable fit. Here are three popular options for closures:
- Buttons: Sewing buttons onto the robe and corresponding buttonholes ensures a snug closure.
- Ties: Attaching fabric ties to the robe allows you to adjust the fit according to your body shape.
- Velcro: Sewing Velcro patches onto the robe offers a convenient and easily adjustable closure.
Choose the closure method that best suits your preferences and sewing skills. Ensure the closures are evenly spaced and securely attached for a polished finish.
Ironing The Completed Jedi Costume
Ironing your completed Jedi costume is the final step to give it a polished, professional look. Follow these guidelines:
- Set your iron to the appropriate temperature for the fabric of your costume. Always check the fabric’s care instructions before ironing.
- Start ironing from the collar and work your way down, smoothing out any wrinkles and creases as you go.
- Pay special attention to the sleeves and the hem of the robe to ensure they are crisp and wrinkle-free.
- Once you have finished ironing, carefully hang or fold your Jedi costume to maintain its freshly pressed appearance.
Ironing your completed Jedi costume not only improves its overall appearance but also ensures that it is ready to be worn for your next Star Wars event or cosplay occasion.
Frequently Asked Questions On How To Make A Jedi Costume?
What materials do I need to create a Jedi costume?
Crafting a Jedi costume requires basic materials such as brown or beige fabric for the robe, a tunic, and pants. Additionally, you’ll need a sturdy belt, boots, and optional accessories like a lightsaber. Choose high-quality fabrics to ensure a more authentic and durable costume.
How can I make a lightsaber for my Jedi costume?
Constructing a lightsaber for your Jedi costume can be done using materials like PVC pipe for the hilt and a transparent plastic tube for the blade. Add details with paint or colored tape to achieve the iconic lightsaber look. Consider incorporating LED lights for a realistic glowing effect.
Are there any easy ways to achieve the Jedi hairstyle?
For the classic Jedi hairstyle, start by growing your hair to a suitable length. Part it in the center and gather it into a low, loose bun or ponytail at the nape of your neck. You can also use hair ties, clips, or hairpins to secure the style in place, achieving a simple yet authentic Jedi look.
What are some tips for creating realistic Jedi robes?
When making Jedi robes, pay attention to the details. Opt for textured and layered fabrics to add depth to the costume. Use a pattern or reference images to ensure the robe’s correct length and fit. Consider weathering techniques like tea staining or light distressing for a more lived-in appearance.
Can I personalize my Jedi costume to represent a specific character or era?
Absolutely! Personalize your Jedi costume by incorporating details specific to a character or era in the Star Wars universe. Add unique accessories, insignias, or color variations to represent Jedi from different orders or time periods, allowing you to tailor your costume to your favorite aspects of the Star Wars saga.
The Last Words
To create your own Jedi costume, follow the guidelines mentioned above. Jedi robes, consisting of an overtunic, undertunic cloak with a hood, and sometimes a tabard, are typically made of comfortable, flowing earth-toned fabric. The hood can be easily sewn by folding and stitching an edge.
For the best quality, use a coating weight wool for the outer robes and interlock-type jersey material for the inner tunic. With these steps, you’ll be able to make an authentic Jedi costume for Halloween or cosplay. May the Force be with you!


